Example
The image below shows a thumbnail displayed as the user mouses over the progress bar:
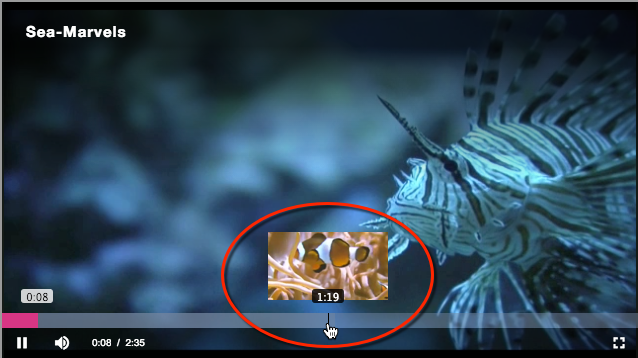
The sample video below demonstrates the use of the Thumbnails Plugin. Start playing the video. Then, mouse over the progress bar and select a thumbnail image to jump to that section of the video.
This topic contains the following sections:
Collect thumbnail images
At this time you must collect the images yourself. Preview thumbnails can be generated as part of the Zencoder encoding process. Also, tools exist like SnapMotion to automate this process.
No matter how you generate the images, you need to decide the number of images you wish to use and choose an appropriate size.
Implement using embed code
Thumbnails can be configured by using the thumbnails plugin. To implement the thumbnails plugin using embed code, follow these steps:
- In Video Cloud Studio, open the Media module.
- Select a video that you want to use, and click the Embed & Preview button.
- In the dialog, select either the Brightcove Default Player, or a player that you have configured.
-
Copy the JavaScript embed code, and add an
idattribute to thevideo-jstag. It should look similar to this:<video-js id="myPlayerID" data-account="1752604059001" data-player="default" data-embed="default" controls="" data-video-id="2026618970001" data-playlist-id="" data-application-id="" width="960" height="540"></video-js> <script src="https://players.brightcove.net/1752604059001/default_default/index.min.js"></script> - Paste the player embed code into an editor with your HTML page code.
- In the
headsection of your page code, add the following CSS file:<link rel="stylesheet" type="text/css" href="https://players.brightcove.net/videojs-thumbnails/videojs.thumbnails.css"> - In the
bodysection, below the player embed code, add the following JavaScript file:<script src="https://players.brightcove.net/videojs-thumbnails/videojs.thumbnails.js"></script> -
Below the previous script, add a script block with the following:
- Get a reference to the player when it is ready
-
Call the
thumbnailsplugin with preview thumbnail images
<script>
  videojs.getPlayer('myPlayerID').ready(function() {
    var myPlayer = this;

    myPlayer.thumbnails(thumb_data);
  });
  var thumb_data = {
      "0": {
          "src": "http://solutions.brightcove.com/bcls/assets/images/sea-lionfish-thumbnail.png",
          "width": 120
      },
      "29": {
          "src": "http://solutions.brightcove.com/bcls/assets/images/sea-anemone-thumbnail.png"
      },
      "54": {
          "src": "http://solutions.brightcove.com/bcls/assets/images/sea-clownfish-thumbnail.png"
      },
      "84": {
          "src": "http://solutions.brightcove.com/bcls/assets/images/sea-seahorse-thumbnail.png"
      },
      "114": {
          "src": "http://solutions.brightcove.com/bcls/assets/images/sea-crab-thumbnail.png"
      },
      "143": {
          "src": "http://solutions.brightcove.com/bcls/assets/images/sea-dolphins-thumbnail.png"
      }
  };
	</script>
This example will display a thumbnail preview image as the mouse hovers over the timeline as follows:
- The sea-lionfish-thumbnail.png image is be displayed from video start to 29 seconds
- The sea-anemone-thumbnail.png image is displayed from 29 seconds to 54 seconds
- The sea-clownfish-thumbnail.png image is displayed from 54 seconds to 84 seconds
. . .
- The sea-dolphins-thumbnail.png image is displayed from 143 seconds to the end of the video
For details about the plugin options, see the Properties section.
-
Here is the complete code example:
<!doctype html>
<html>

<head>
	<meta charset="UTF-8">
	<title>Display Thumbnail Previews</title>
	<link rel="stylesheet" type="text/css" href="https://players.brightcove.net/videojs-thumbnails/videojs.thumbnails.css">
</head>

<body>
	<video-js
		id="myPlayerID"
		data-account="1752604059001"
		data-player="default"
		data-embed="default"
		controls=""
		data-video-id="2026618970001"
		data-playlist-id=""
		data-application-id=""
		width="960" height="540"></video-js>
	<script src="https://players.brightcove.net/1752604059001/default_default/index.min.js"></script>

	<!-- Script for thumbnails plugin -->
	<script src="https://players.brightcove.net/videojs-thumbnails/videojs.thumbnails.js"></script>

	<script>
	  videojs.getPlayer('myPlayerID').ready(function() {
	    var myPlayer = this;

			myPlayer.thumbnails(thumb_data);
	  });
		var thumb_data = {
        "0": {
            "src": "http://solutions.brightcove.com/bcls/assets/images/sea-lionfish-thumbnail.png",
            "width": 120
        },
        "29": {
            "src": "http://solutions.brightcove.com/bcls/assets/images/sea-anemone-thumbnail.png"
        },
        "54": {
            "src": "http://solutions.brightcove.com/bcls/assets/images/sea-clownfish-thumbnail.png"
        },
        "84": {
            "src": "http://solutions.brightcove.com/bcls/assets/images/sea-seahorse-thumbnail.png"
        },
        "114": {
            "src": "http://solutions.brightcove.com/bcls/assets/images/sea-crab-thumbnail.png"
        },
        "143": {
            "src": "http://solutions.brightcove.com/bcls/assets/images/sea-dolphins-thumbnail.png"
        }
    };
	</script>
</body>
</html>
Properties
The following plugin properties are used to control the thumbnail images:
- first argument:
- The value can be a string or number, and is associated with an object.
- This defines the time in seconds you wish to display your thumbnail image.
- At a minimum, you need a
0property with asrcvalue for when users hover over the beginning of the progress bar. If you have additional times, the plugin will partition the progress bar and display the appropriate image as the user hovers over the progress bar.
src:- The value must be a string.
- This is the URL for your thumbnail image.
width:- This property needs to be included for the first thumbnail image. It keeps the image from sliding out of display when near the beginning or end of the progress bar.
Here is an example for setting thumbnail images for three blocks of time in the progress bar:
- The first image is displayed when a user mouses over the progress bar from video start to 5 seconds
- The second image is displayed from 5 seconds to 10 seconds
- The third image is displayed from 10 seconds to video end
  {
    "0": {
        "src": "http://solutions.brightcove.com/bcls/assets/images/Tiger-4-preview.jpg",
        "width": 120
    },
    "5": {
        "src": "http://solutions.brightcove.com/bcls/assets/images/Water-4-preview.jpg"
    },
    "10": {
        "src": "http://solutions.brightcove.com/bcls/assets/images/BirdsOfAFeather-4-preview.jpg"
    }
  }
CSS image sprites
If you choose you can use CSS image sprites as your preview thumbnails. The following JSON is an example for the options property when using a CSS image sprite:
{
  0: {
    src: 'thumbnails.png',
    style: {
      left: '-60px',
      width: '600px',
      height: '68px',
      clip: 'rect(0, 120px, 68px, 0)'
    }
  },
  10: {
    style: {
      left: '-180px',
      clip: 'rect(0, 240px, 68px, 120px)'
    }
  },
  20: {
    style: {
      left: '-300px',
      clip: 'rect(0, 360px, 68px, 240px)'
    }
  },
  30: {
    style: {
      left: '-420px',
      clip: 'rect(0, 480px, 68px, 360px)'
    }
  },
  40: {
    style: {
      left: '-540px',
      clip: 'rect(0, 600px, 68px, 480px)'
    }
  }
Changelog
None reported