Using a Screen Reader with the Brightcove Player
The screen reader allows blind and visually impaired users to listen to the actions within a video. It does this by reading a defined WebVTT descriptions file. This is helpful if there is limited or no talking in your video.
Resources
Some helpful resources include the following:
The player
This example uses a WebVTT file to describe what is happening in the video. The description text is read by a screen reader so that visually impaired users can follow the action in the video.
Use a screen reader with this video
Follow the steps below to turn on the descriptions and the screen reader.
- Start playing the video above, and stop it when you can see the player controls.
- In the control bar, mouse over the Descriptions icon and select the English descriptions, en description.
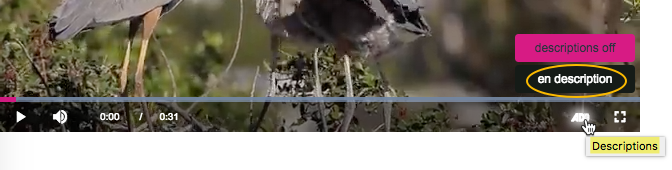
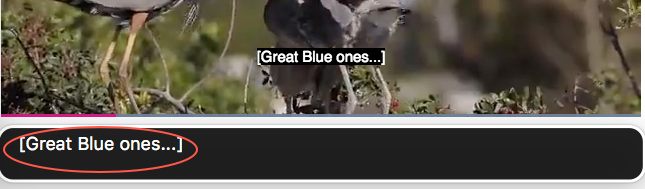
Description icon in control bar - You should now see the text from the descriptions file, displayed in the player.

Descriptions text - We will now enable the VoiceOver screen reader which comes with a MacOS machine. Select CMD + F5 to turn VoiceOver on.
- When the VoiceOver modal dialog appears, select the Use VoiceOver button.
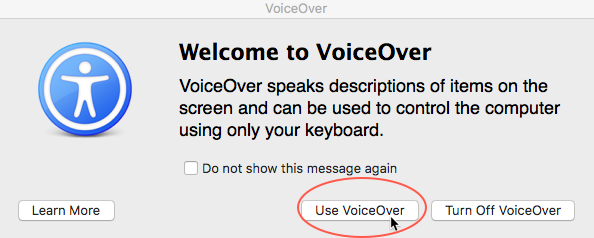
Use VoiceOver dialog window - A VoiceOver control bar will appear, where you will see and hear the text from the descriptions file for the video. You will also see and hear any actions you perform on your computer.
VoiceOver control bar - Select CMD + F5 to turn VoiceOver off.
Preparing your video
To use the descriptions icon in the player control bar, you must create a WebVTT text track file and associate it with your video. To learn how to do this, follow these steps:
-
Create a text track file which describes the actions in your video. This file is the same as creating a captions file, except that you will apply it to your video as a description type in a later step. For details about creating this file, see the Adding Captions to Videos using the Media Module document.
Your text track file should look similar to this:
WEBVTT 00:00:00.000 --> 00:00:05.000 [Herons...] 00:00:05.000 --> 00:00:10.000 [Great Blue ones...] 00:00:10.000 --> 00:00:15.000 [Nesting...] 00:00:15.000 --> 00:00:20.000 [Enjoy...] 00:00:20.000 --> 00:00:25.000 [Florida 2016] -
Brightcove Player customers can learn how to Add Captions to Videos programmatically.
Next, you will associate your text track file with your video. Video Cloud customers can log into Studio and navigate to the Media module.
- Find the Text Tracks section, and select the Edit button.
- Either upload your text track file or specify the external URL.
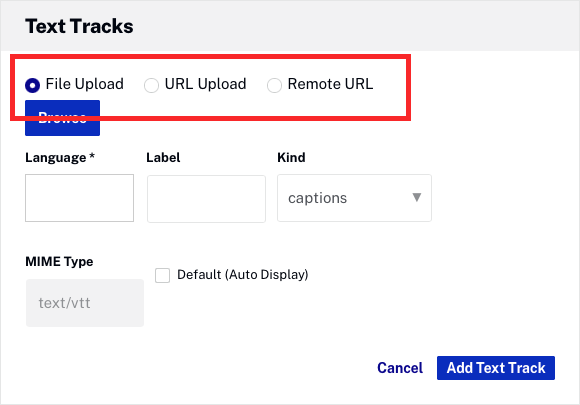
Upload your text track file - Enter the two letter language code for the language of the text track data. In this example, you will enter en for English. Check to see which languages your screen reader supports.
- Set the Kind of text track to descriptions.
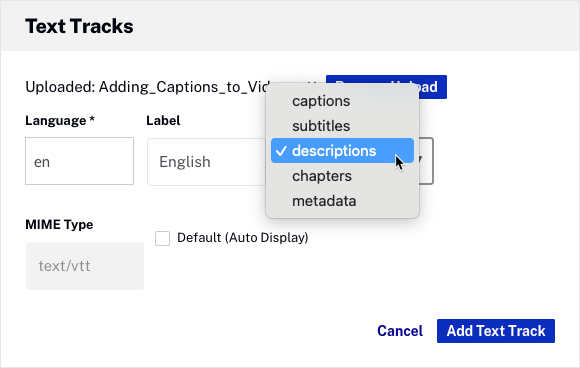
Set Kind of text track to descriptions - Leave the default MIME Type value. You can select default to set this language as the default language.
- Select the Add Text Track button to save the text track information.
- You are now ready to use this video with a Brightcove Player and a screen reader.