In this topic, you will learn how to use Video Cloud Studio and a spreadsheet to identify and delete low performing videos.
Introduction
For a number of reasons, it is probably best to not have videos in your library that are not viewed, and you guess they won't be viewed in the future either. In this document you will see how to identify these videos and remove them from your library. The following bullet points provide a high level overview of the process. The detailed steps then follow.
Use the Media module to export a file that contains a row of information for every video in your library.
Use the Analytics module to create a custom report that includes the video ID, title, video impressions and video views. The report will be exported in a comma separated values (CSV) format and list only those videos with non-zero video views and/or impressions.
Import both the CSV files into a Google Docs spreadsheet.
Add a column to the all videos spreadsheet that determines if the video detailed in a particular row has video views or not. This is done by checking to see if an ID in the all videos spreadsheet has a matching entry in the Analytics report spreadsheet.
Copy the IDs of the videos with no views to a Google Doc and manipulate the format to use in a bulk deletion process.
Export all videos data
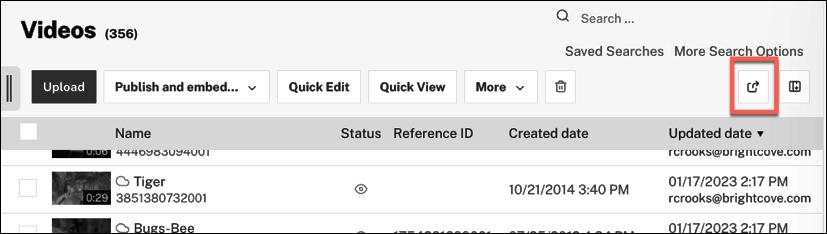
From the Media module you can get a report on all media in your library. This will be used later in a spreadsheet.
Open the Media module.
Click the export icon near the top-right of the page. The Export Videos Data dialog opens.
Export Videos Data dialog
Make sure All rows in the list is selected. Note that the export includes up to 15,000 rows.
Optionally tick Include current URLs for video renditions if you also want rendition URLs in the file.
Click Export. The CSV file is downloaded to your computer; the file name corresponds to your account ID.
Create custom Analytics report
To create the Analytics report that includes videos with views, perform the following steps:
Open the Analytics module.
In the left side menu, click Analytics Reports (under the Reports group).
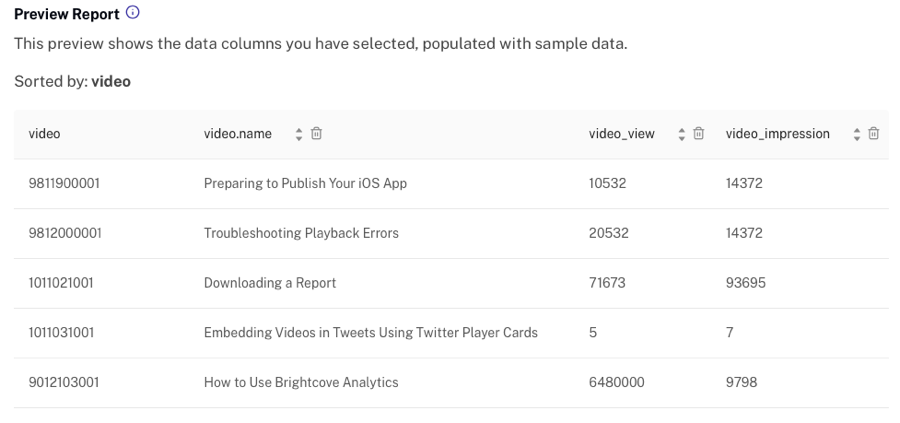
Click New Report in the top-right corner. The New Report dialog opens with two panels: configuration on the left and a live Report Preview on the right.
New Report dialog with live preview
In the Accounts and Dates section, accept the default Report Name or type a new one.
Use the Accounts Included dropdown to pick the account(s) for the report.
For Report Type, select One-time.
Pick a Start Date and End Date for the report.
For Format, choose CSV.
Use the Email me when the report is ready toggle to control whether a notification email is sent. Add additional recipients under Additional Email Recipients if needed.
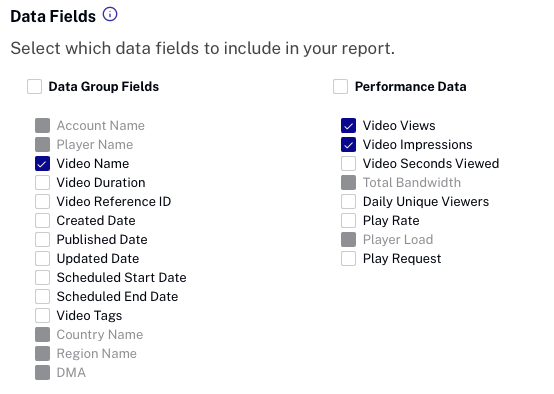
Expand the Data section. In the Data Groups picker, select Video. This sets each row of the report to a single video and unlocks the video-level fields.
In the Data Group Fields list, check Video Name. Scroll down to Performance Data and check Video Views and Video Impressions. The Report Preview updates with sample data as you tick the boxes; the video ID column is included automatically.
Performance Data fields selected and reflected in the preview
Click Create. The report is generated; after a short delay the CSV file is downloaded.
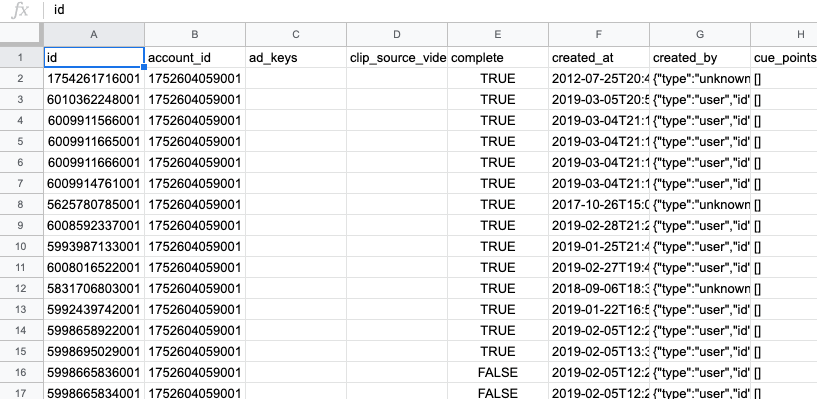
Import the all videos file
In this section of the document you will open the exported all videos report created from the Media module.
Open a Google Docs blank spreadsheet.
Select File > Import > Upload, then either drag the all videos CSV file (named after your account ID) to the proper location or browse to select it.
On the Import file dialog, accept the defaults and click Import data:
Your imported data will appear similar to the following:
Import Analytics report
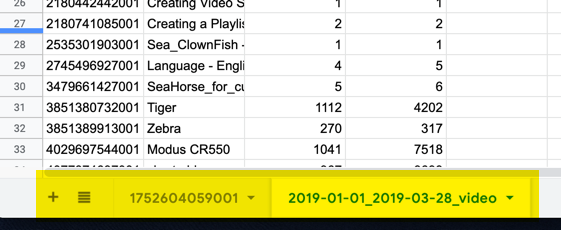
You will now import into another sheet (in the same spreadsheet group) the Analytics report you created.
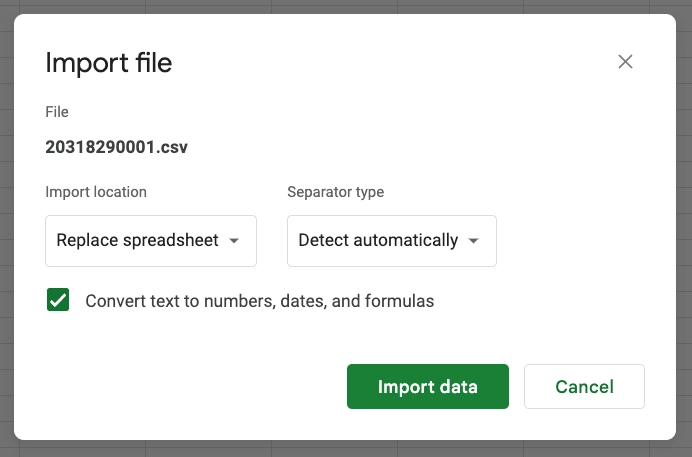
Select File > Import > Upload, then either drag the Analytics report CSV file to the proper location or browse to select it.
On the Import file dialog, BE SURE to change the Import location to Insert new sheet(s). Accept the other defaults and click Import data:
Your imported data will appear similar to the following. Note that at the bottom of the spreadsheet you can see the two sheets listed.
Create a named range
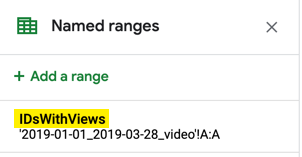
You will now add a column that will determine if a video has any views. To do that, you will need to reference the IDs in the Analytics report (those videos with views). To make the process easier you will now create and name a range.
While still in the Analytics report sheet, click on the uppercase A at the top of the first column.
Right click somewhere in the column and select View more column actions > Define named range
A panel will open on the right side of the spreadsheet. Change the default name of NamedRange1 to IDsWithViews.
After pressing enter, you will see the range defined.
Add column for no views determination
You will now add a column and add a VLOOKUP() function which will report if a specific video has any views.
Return to the all videos sheet, named with your account ID.
Click on column B.
From the spreadsheet menu, select Insert > Column left. This creates a new, blank column B.
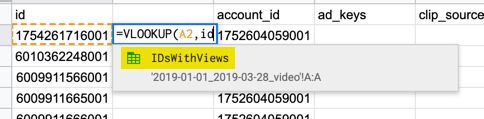
Click in cell B2.
Enter =VLOOKUP(. This starts the use of the function.
Just after the opening parentheses, click on the A2 cell. That cell location will be inserted. This defines for what the function will be looking.
Enter a comma after the cell, then type id. You will see you can select the named range, and do select it.
This defines where the function will be looking for the value in A2.
Enter a comma after the named range, then type the number 1. This defines the column index to be returned. For you, this means that if the ID in A2 is found in the named range, the ID will be placed in the cell.
Enter a comma after the number 1, then enter FALSE, then type the closing parentheses. This option tells the VLOOKUP() function if columns are sorted and the exact value cannot be found, the closest value should be returned. Since you do not want this to occur, FALSE is the correct value to enter.
Ensure your function is defined correctly, as shown here, and press Enter.
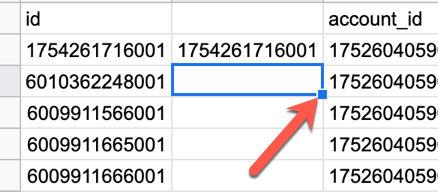
Cell B2 will either display the ID from A2 , or #N/A.
Click back in cell B2 and be sure it is highlighted.
To copy the formula down the entire spreadsheet, double click on the blue square at the bottom right of the highlighted cell, which is currently B2.
In column B you will now see either IDs repeated from column A, or #N/A. If you see the ID, it tells you that the video represented by that ID was found in the Analytics report. In other words, it has video views. And as you can surmise, if you see #N/A the video represented by the ID in column A has no views.
Delete videos with no views
You will now sort the spreadsheet so all videos IDs with no views are grouped together. You will then copy those IDs and format for bulk video deletion.
Highlight column B, then from the spreadsheet menu select Data > Sort sheet by column B, Z -> A. This groups all the videos with no views at the top of the spreadsheet, represented by #N/A in the cell.
You now have two options on how to proceed. They are:
If you have a small number of videos to delete, you can simply go into Studio and manually delete in the Media module.
If you have a significant number of videos to delete, you may wish to continue to perform the following steps to ease the burden of deleting the videos.
Highlight, then copy, ONLY the video IDs for the videos you wish to delete. Do not include any videos that are missing an ID or name as this means the video is already deleted.
Open a Google Doc document.
From the document menu, select Edit > Paste without formatting. You will simply see the video IDs in a column. To bulk erase the videos they must be in the format id:12345678 id:23456789 .... Rather than editing the list by hand, continue with these steps.
Select Edit > Find and replace...
For the Find value enter \n. This represents a carriage return.
For the Replace with value enter a space followed by id:. The space in front of the id: is crucial for correct formatting.
Check the Match using regular expressions checkbox.
Click the Replace all button, then close the dialog.
Ensure your list of video IDs now appears similarly formatted to following:
To finish the formatting, you will need to place an id: in front of the first video ID. Then remove the id: at the end of the list that has no matching actual video ID.
You will now see all the videos listed that match the IDs you selected earlier. You can now individually select videos to be deleted or check the select all box and delete the videos.